Friday, September 23, 2011
Halloween decorations 2011
Hi,everyone :)
I'm back and I already started my countdown for Halloween.Yes,I know it's early!But I will prepare Halloween party decoration this year.It's will be very busy month.I will share with you many ideas for Halloween decorations because we have very big common room to decorate.So ... let's get started :)
First idea I found at eBay.I can't post link because it's already sold but I will show you my idea to make it.It is very simple and may be there is many ways to do it.It's a spider net.
Here is result:
What you need?
Here is everything I found usefull.
First step is to cut 4 equal pieces of rope.They will be main part.Knot them together at middle.I used other small piece.
I found usefull to fix every knot with pin.
Second step is to make the rest of the net.
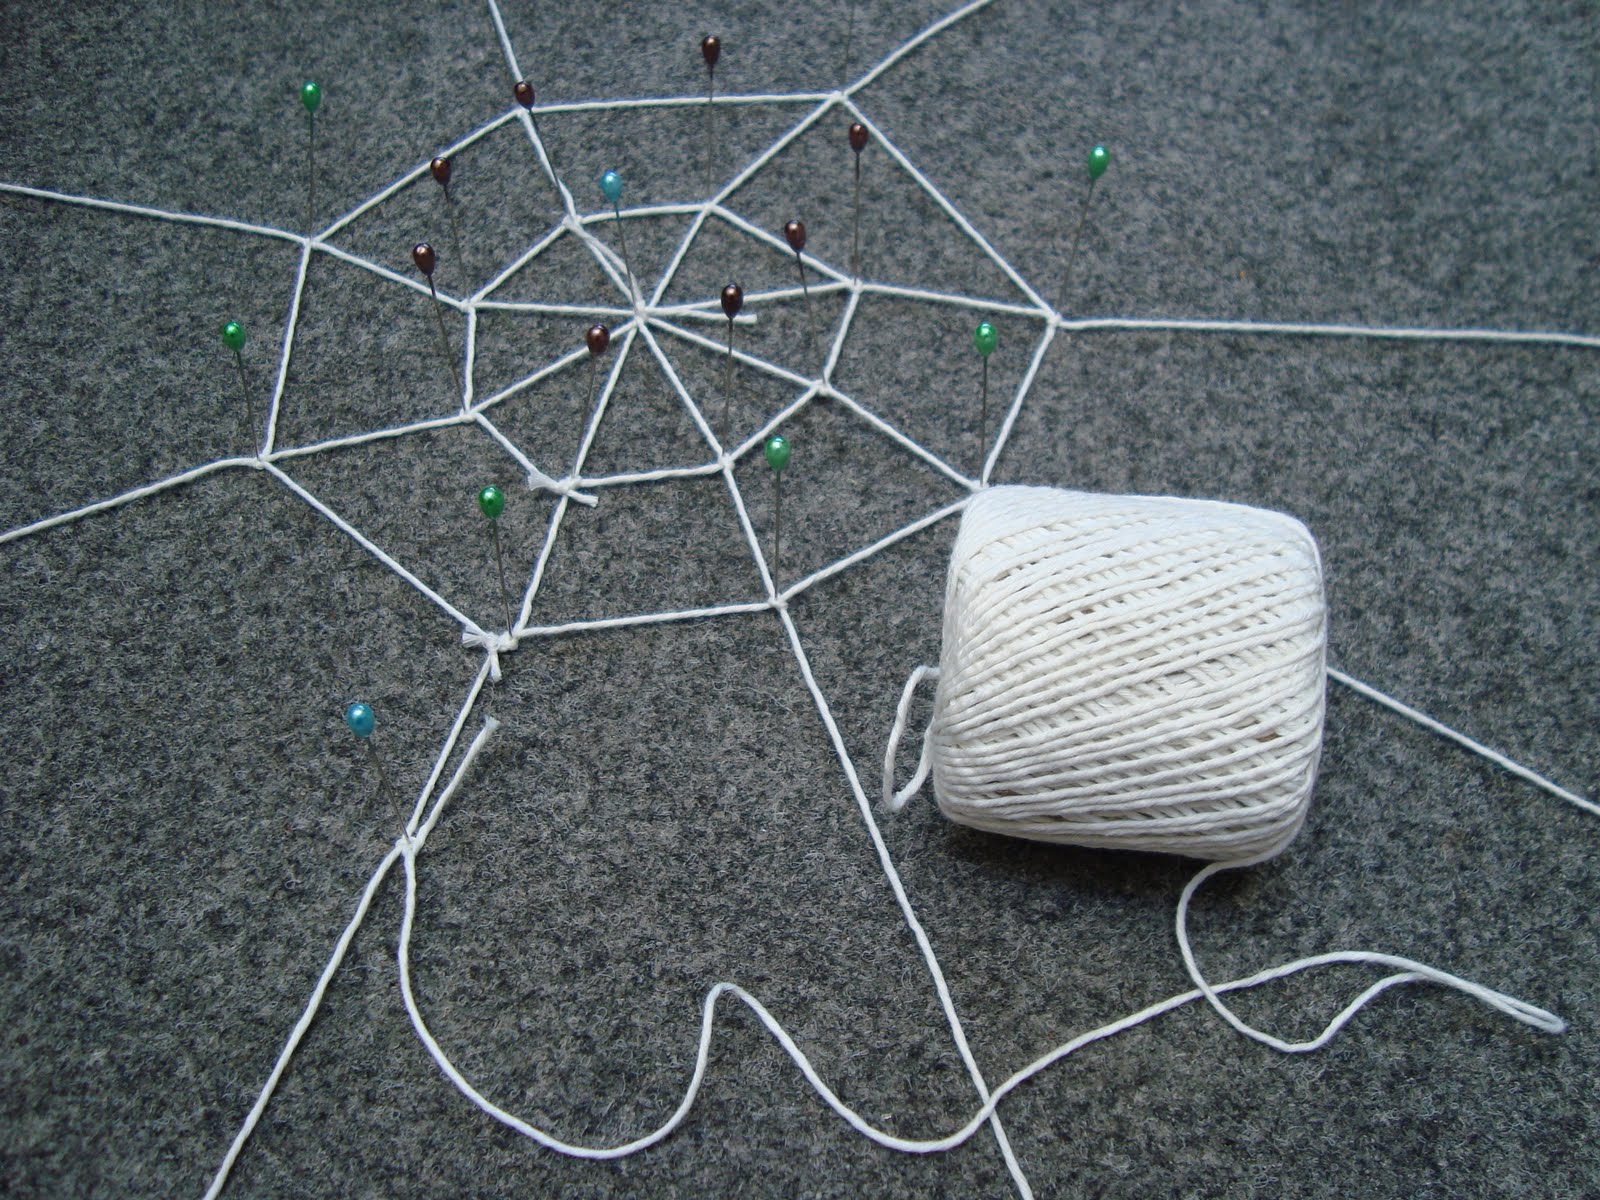
That is result before I take away pins.
You are ready to hang up all nets on the corners.I also will use stretchable spider net to increase the effect :)
I will upload more photos when we are ready with all party decorations.
Tuesday, June 14, 2011
Baby month
Hi everyone,
From today I will start baby month in my blog.I have birthday soon and I was inspired.I will be back home for summer and I will make baby scrapbook to my old photos.I also have few requests for baby scrapbooks so I will have fun :)
Here is my first post - iris folding cards for baby girl and baby boy.I made them with scraps :)
From today I will start baby month in my blog.I have birthday soon and I was inspired.I will be back home for summer and I will make baby scrapbook to my old photos.I also have few requests for baby scrapbooks so I will have fun :)
Here is my first post - iris folding cards for baby girl and baby boy.I made them with scraps :)
I order Graphic 45 "The Magic Of Oz" paper!!! I can't wait to receive it :) If you don't know where you can find it chek this web site: http://www.thejulebox.com/ You can order it from here ... VERY GOOD price.
Sunday, May 15, 2011
Capture fairy in a jar - tutorial
Step 1
Glue moss to the bottom.
Inside view
Outside view
Step 2
Glued stone or something else that fill half bottom
Inside view
Outside view
Step 3
Glue acorn,branches,lichen and pieces bark.Don't put too much things and always check how will look before stick it down.
Inside view
Outside view
Step 4
Glue your fairy ( and in this case the frog )
Inside view
Outside view
Last step
Glue paper flower,dry flowers,dew drops,butterfly ... everything else you like to put.I didn't use hot glue to stisk them because they are too small.I use something that I bought in Denmark ... probably it is glossy accents like those
What I use is
Dry flowers
Inside view
Outside view
I will make another tutorial to show you how to make outside decoration of your jar.If you have questions leave me comment or send me e-mail.I will do my best to answer you as soon as possible.
Saturday, May 14, 2011
Capture fairy in a jar - supplies
Here you can find what I used
You can use also cones,dry leafs,dry flowers,grass,curly branches ... everything you find useful.
Here I found other things you can use instead of regular jar:
You can use also cones,dry leafs,dry flowers,grass,curly branches ... everything you find useful.
Here I found other things you can use instead of regular jar:
Capture fairy in a jar - what you need
Hi,everyone
Today I will give you some advices about making capture fairy in a jar.First I have to apologize because I didn't have time to make this post earlier.I was very busy and I didn't find time to post anything in my blog.
I will post today some information that you need as well as some links.
Here is my jar.It is jar from instant coffee.I like these jars because they are made from very solid glass.Mainly I use them in my kitchen but they are perfect for everything.You can use every type of jar that you have at home.
What I recommend is to use jar with hole that is big enough to fit your hand inside otherwise you will need tweezers.
Next very important thing is what you can put inside.As you can see I put stone.That can be mistake!!!Everything in my jar stuck perfect except the stone.I use hot glue gun and it doesn't work.If anyone find glue that works let me know :) You can put stone inside for personal use only.If you plan to send it somewhere don't use stone because it will destroy everything else inside.
On the basis I used dry moss.If you didn't have any you can buy some decorative moss:
Probably you will find dry moss in floral section in "Michaels" or "Joann".
Good thing - dry and still green!!!
If you use moss from nature you have to leave your jar open for few days to remove moisture.This is last minute project.So if you have to make gift for next day it is perfect.In this case you don't have time to wait to remove moisture.Just doesn't glue the lid!If there is any moisture you should be able to open it for few days.
I think that's all you need.If you have any questions leave a comment or send me e-mail.I'll do my best to answer you as fast as possible :) Have a nice and sunny weekend :) See you soon with photo tutorial how to make your jar :)
P.S. You can make different theme jars!!!
Today I will give you some advices about making capture fairy in a jar.First I have to apologize because I didn't have time to make this post earlier.I was very busy and I didn't find time to post anything in my blog.
I will post today some information that you need as well as some links.
Here is my jar.It is jar from instant coffee.I like these jars because they are made from very solid glass.Mainly I use them in my kitchen but they are perfect for everything.You can use every type of jar that you have at home.
What I recommend is to use jar with hole that is big enough to fit your hand inside otherwise you will need tweezers.
Next very important thing is what you can put inside.As you can see I put stone.That can be mistake!!!Everything in my jar stuck perfect except the stone.I use hot glue gun and it doesn't work.If anyone find glue that works let me know :) You can put stone inside for personal use only.If you plan to send it somewhere don't use stone because it will destroy everything else inside.
On the basis I used dry moss.If you didn't have any you can buy some decorative moss:
Probably you will find dry moss in floral section in "Michaels" or "Joann".
Good thing - dry and still green!!!
If you use moss from nature you have to leave your jar open for few days to remove moisture.This is last minute project.So if you have to make gift for next day it is perfect.In this case you don't have time to wait to remove moisture.Just doesn't glue the lid!If there is any moisture you should be able to open it for few days.
I think that's all you need.If you have any questions leave a comment or send me e-mail.I'll do my best to answer you as fast as possible :) Have a nice and sunny weekend :) See you soon with photo tutorial how to make your jar :)
P.S. You can make different theme jars!!!
Sunday, May 1, 2011
Subscribe to:
Posts (Atom)


