Tuesday, December 6, 2011

Matchbook mini album

Third day of 12 Creative Days Of Christmas 2011

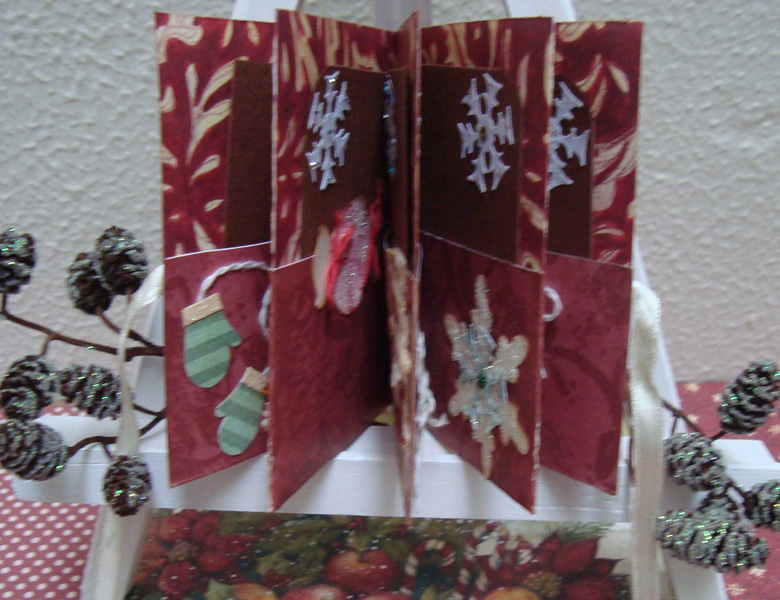
On tird day of Christmas I made a matchbook mini album. I'm very happy that finally I made one of these. This is easy and quick mini album. I used large size cello bags (12.7cm x 28.5cm) but I cut part of them because they was too long. 

Here is link to Laura Denison blog: http://followingthepapertrail.blogspot.com/2009/12/on-fourth-day-of-christmas.html
Here is link to her YouTube video:
http://www.youtube.com/watch?v=sEcVjjcUEYw


That is first page. I made small corner to embelish all pages. 


These are some tags that embelished each page.


These pretty snowflake embelished inside cover


These are few tags I put in each cello bag. I used creamy,green and brown basic cardstock and covered it with scrapbook design paper - K&Company 


On back side I make simple embelishments:


Monday, December 5, 2011

Second day of 12 Creative Days Of Christmas 2011

Here is my second project. It is mini book for Christmas wishes. It's made out of 1 sheet 12x12. You can find a lot of tutorials at YouTube how to make mini books. Embelish them as you like and write Christmas wishes. 


Sunday, December 4, 2011

12 Days of Christmas

First day of 12 Creative Days Of Christmas 2011


Welcome to the 12 Crearive Days Of Christmas 2011 projects here in my blog! I will post 12 Christmas projects until 23.12.
We finally saw snow in Ã…rhus today! Yay ... and it was gone as fast as it comes ha ha ha
That was my window few hours ago :)


This December I have 1 year anniversary in my blog! I can't believe Christmas knock on the door again ... how time flies! Previous year I didn't have time for 12 projects because I create my blog too late.
I keeped an eye on YouTube and some other blogs. And I've seen so cool Christmas projects but ... all of them needed huge amount of supplies. Then why you call it ''scrap''+book? Use your left-over papers more often! They cost money and dead tree! THINK GREEN this season!!!
So much people saw my captured fairy in a jar that I decided to made Christmas themed jar. I will post another jar project for your fireplace decoration. Anyway ... here is my first project!Enjoy!


This is a jar full of Christmas cards. I made this cards from left-over basic cardstock and design paper.
1. Overlay bottom with batting and styrofoarm pellets. They create impression that there is snow in the jar.
2. Don't put too many cards ... leave spase to put cones. They will give finished look to your jar.


And here are my cards.I made 2 types - mittens and presents. Mittens was little time consuming for because I use my own template.First cut mittens,then put extra piece on top from basic cardstock and in the end put glitter. Presents are very easy - cut squares and rectangles and tie fibers. They look like wrapped presents. You can make this cards more complicated ... that's up to you :)


Hope you like my first project.

Friday, October 21, 2011

Halloween decorations 2011


I made some cut fingers from clay.I found some body parts at eBay but I decide to save money and made my oun.Probably they look as fake as original ones but during the night they look realistic.Some fingers I put in jars with moss.Others I will put around the candles.


Thursday, October 13, 2011

Halloween decorations

Another day in my blog with Halloween decorations!!!
Here is one picture that inspired me


I will make something similar.I keep some jars,wine bottles and tins.I'll fill them with colored water or gelatin and some plastic spiders.I also will print labels like "Blood wine","Wicked spirits","Hell juice" ...


Here is some of the tins:


I also make some photo frames.


And the last thing is a book - Book of spells.It's not finished yet because I still don't know what else missing.


Friday, September 23, 2011

Halloween decorations 2011


Hi,everyone :)
I'm back and I already started my countdown for Halloween.Yes,I know it's early!But I will prepare Halloween party decoration this year.It's will be very busy month.I will share with you many ideas for Halloween decorations because we have very big common room to decorate.So ... let's get started :)
First idea I found at eBay.I can't post link because it's already sold but I will show you my idea to make it.It is very simple and may be there is many ways to do it.It's a spider net.
Here is result:


What you need?
Here is everything I found usefull.


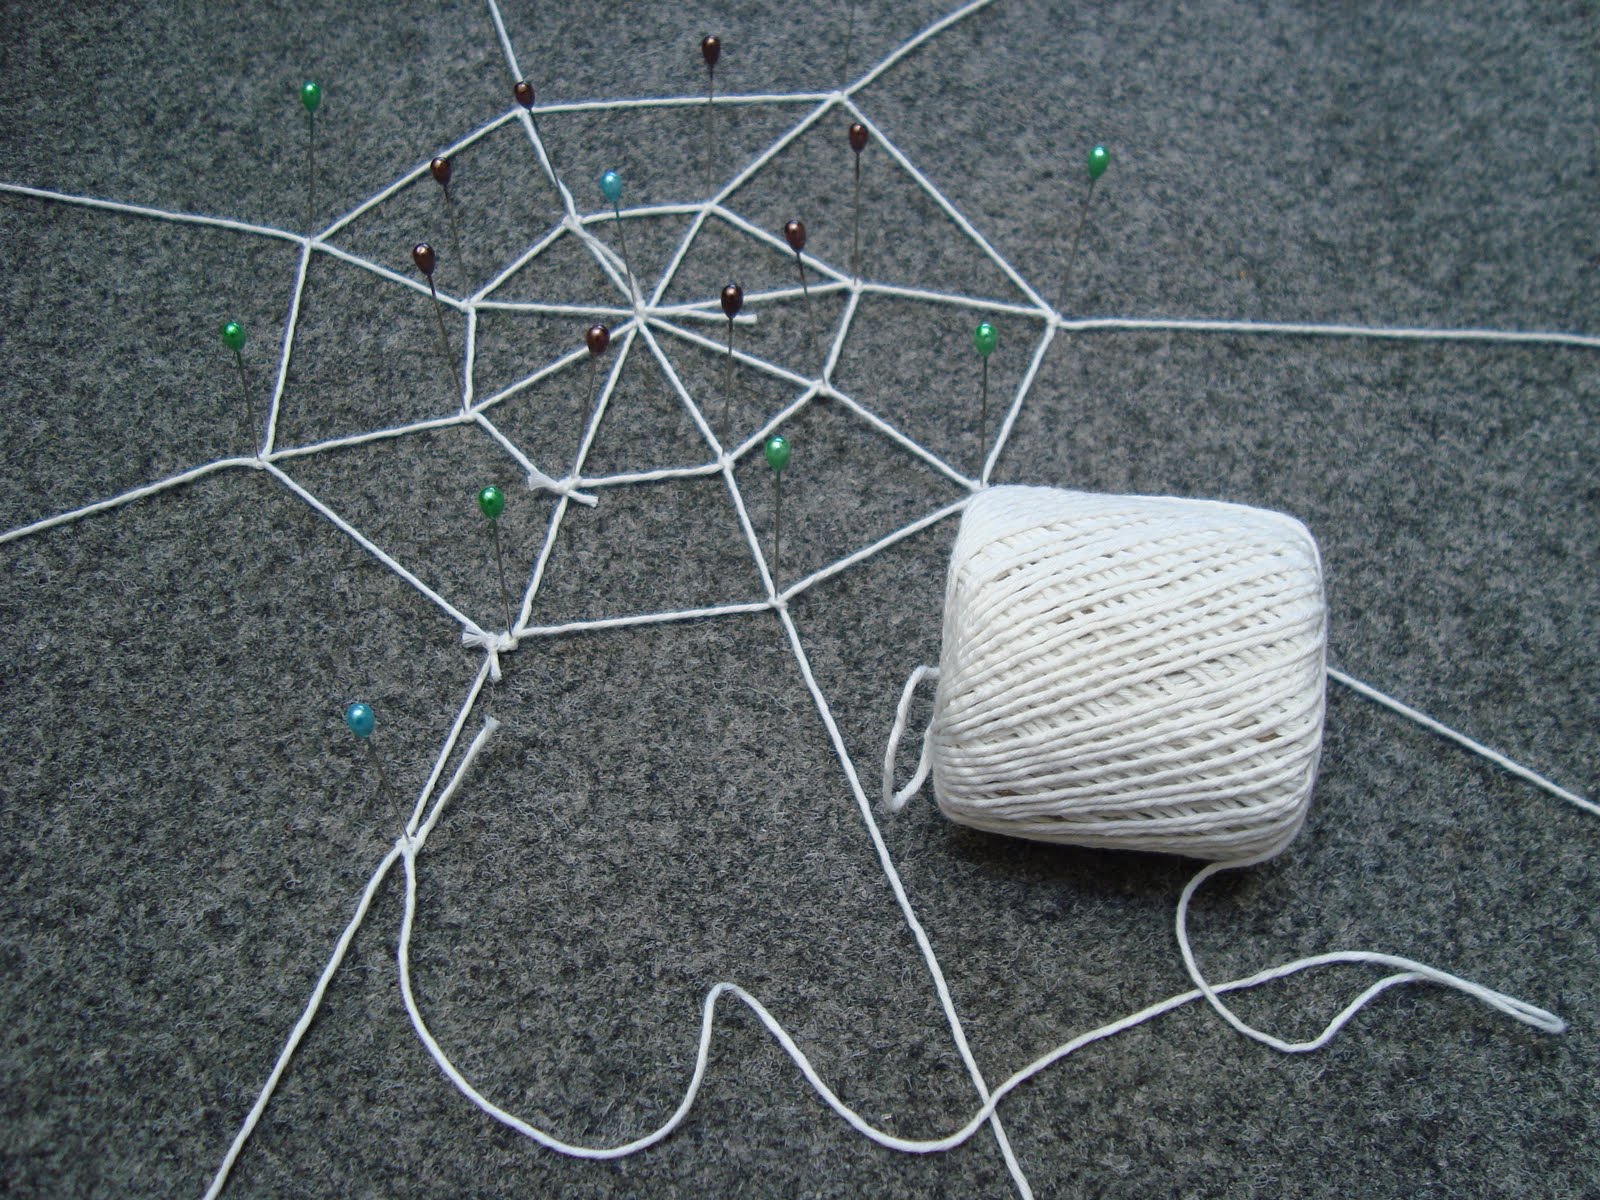
First step is to cut 4 equal pieces of rope.They will be main part.Knot them together at middle.I used other small piece.


I found usefull to fix every knot with pin.

Second step is to make the rest of the net.


That is result before I take away pins.


You are ready to hang up all nets on the corners.I also will use stretchable spider net to increase the effect :)
I will upload more photos when we are ready with all party decorations.